Wednesday, June 3, 2009

the shattered series

I've really been enjoying making the larger items for my houseware line (plates, bowls, magnets, game boards, etc) but it's taking awhile to fuse everything since I can only get between 1-3 items in the kiln at a time.

I thought I was being pretty clever when it dawned on me that I could just add a second shelf to my kiln and double my fusing space. Well, this was not as straightforward as I thought it would be as the added shelf disrupted heat circulation and my usual firing schedule just wasn't doing what it was supposed to.

On first try the bottom shelf was too low and the items only tack fused. Then I tried elevating the bottom shelf, and in doing that had to elevate the 2nd shelf which put it too close to the element and everything on it over fired.


So now I'm slumping on the bottom of the kiln and doing a full fuse firing at the same time. This is quite helpful, especially since I kept making new items instead of doing a second firing to finish already made items.

Here are the first few items I made for the upcoming market (www. I will be slumping them into a plate mold with a flat bottom and slightly sloped sides.


On a base of red transparent glass topped with off-white opalescent glass that was shattered and reassembled. 8" b8"


A base of bright blue with smashed white glass on top. 5" by 5"


Transparent yellow base with shattered black glass fused on top. 8" by 8"


Transparent deep purple base with off-white broken glass. 5" by 5"

Tuesday, June 2, 2009

more melts??

Yes, you can never have enough pot melt pendants!!

My latest melt used a combination of opalescent white and red glass (and just a sprinkle of brown) with transparent red, orange and clear glass. I think this is my favourite melt so far! Although I think I say that after each one I make :)


I had just started cutting the disc up when I remembered that I hadn't taken a picture of it yet!


Please excuse the bad lighting :(

I've been busy fusing away to prepare for the market I registered for. I picked 4 dates over the summer: Saturday June 20th, Saturday July 25th, Saturday August 8th and Saturday September 19th. There is a limit to the number of jewelry vendors (so it's not just a jewelry market for people looking for a variety of item and so that the other jewelry artisans don't have too much competition) so I'll be focusing on houseware items for the first three shows. Jewelry items can make up to 1/4 of my display on those days with additional items on hand if needed. The last date, September 19th, will be my jewelry extravaganza!!

Check it out at: http://www.wychcraftmarket.com

It's a new outdoor market in Toronto that had it's first run on May 23rd. My hubby drove past it last weekend and reported back that it's a fairly small event so I don't know if I'll get that much traffic coming through. That might be okay to ease me in though, I'm a little nervous about showing my stuff! If you're in the neighbourhood be sure to stop by and stay hello!

Sunday, May 24, 2009

Millefiori Madness

At last post I excitedly reported that I had purchased supplies to make millefiori pieces. I just love the look of millefiori. When I was in Venice, Italy in 2006 I was able to visit the furnaces on Murano island and watch glass blowing as well as these canes being made. I treated myself to several pieces of jewelry and a few small plates while I was there. My favourite is a pendant made up of black and white millefiori. One day I hope to be able to make a close approximation.

Here's a pic of the pendant that started my glass obsession:


I had so much fun making pendants using slices of murrine but it seems that I'm not the only one who loves the look of millefiori - almost all of the pieces I made have been sold! Thankfully I was able to place an order to be shipped (which saved me driving 1.5 after work, or 2.5 hours from home!) to replenish my stock.

I spend the weekend making dichoric pendants and earrings and houseware items - plates, bowls, magnets and 2 tic-tac-toe boards. I registered as a vendor in an outdoor craft and artisan market for a few Saturdays this summer so I needed to start building my inventory. Hopefully I'll get back to millefiori next weekend.

These pieces are made with only murrine slices. About 40 to 50 pieces of cane in each pendant and multiple firings were needed to achieve the desired effect:


More pendants. These were made using murrine pieces but have a base of clear, black or white glass.


For those that are interested in a little education: The millefiori technique involves the production of glass canes or rods, known as murrine, with multicolored patterns which are viewable only from the cut ends of the cane. To make the canes the glassmaker gathers molten glass on an iron rod called a pontil, then the heated glass is dipped into a mold (that shapes the glass). The glass is cooled and the process is repeated over and over again, until the design is completed and the cane consists of several layers of glass.

In the next step, the canes are reheated and an iron rod is attached to each end this time, instead of just one end. While the glass is still hot it has to be stretched and pulled. This requires two people, one on either end of the glass, each holding a iron rod. It is a bit like pulling taffy, but more precise.

One day I would like to try and make my own murrine canes but for now I'm quite happy buying them already made. Somehow I don't think I'll ever be able to get away with building a glass furnace in my house and they can't be made in a kiln.

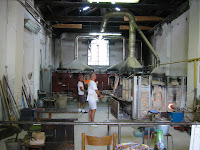
Watching glass artisans at a furnace on Murano island:

Monday, May 4, 2009

pot melts = cool pendants

Since my last post I've been really busy fusing. I've done 3 more melts (all using a steel grid), made many pendants and earrings, bought new power tools and expanded my glass inventory.

Instead of slumping the melts I decided to cut them up and make them into pendants. I bought a wet saw which is just great at cutting through thick slabs of fused glass. The saw has a big blade so I ended up losing a bit of glass as I cut and it's definitely not the tool of choice for cutting anything other than straightish lines.

Here are 2 of the melts after firing. I also made a green melt but forgot to take a picture before I cut it up.


The new saw making it's first cut.


Practicing my skills. I was pretty impressed I could cut a heart (on my first try) but had no luck replicating it. Beginners luck i guess.


Blue melt pendants:


Pendants made from the purple melts:


Green melt:


Some exciting news (well, for me anyway because I am such a glass fusing nerd)! I finally found a store that stocks millefiori canes so I bought a bunch and spent the weekend experimenting with this glass (which is a different coe than I am used to; 104 coe). I've made a few pendants so far and LOVE how they turned out. I had to do multiple firings to get the proper effect but i think it was worth the effort. I'll get some pictures posted soon.

Friday, April 3, 2009

pretty purple pot melt

Ever since I read A Beginner's Guide to Kiln-Formed Glass by Brenda Griffith I've been dying to try a pot melt.

It looked to be so easy - cut up a bunch of glass and heat it way past the full-fuse temperature until the glass becomes a liquid and flows out of it's container onto a prepared shelf/basin on the kiln floor. After researching the topic a little further it seemed that there are 2 main ways of doing a pot melt: either by using a terra cotta pot to hold the glass (and enlarging the drainage holes in the sides of the pot so the glass has enough space to flow out of) or by using a stainless steel grid. Both methods result in a very different look because of the pattern that is formed by the flowing glass.

After several weeks of scouring local stores it became evident that I was not going to be able to collect all the items I needed for either method on my own. I ended up buying a pot melt kit from Slumpy's that would enable me to do the grid style of pot melt.

Step 1:

Preparing the kiln: Fiber paper was placed on the kiln floor and a 9" round stainless steel casting ring was set atop the paper. After cutting the grid to size, it was placed on top the ring.


Step 2:

Preparing the glass: I chose a combination of opalescent and cathedral (transparent) glass in clear, white, gray and purple. A second casting ring was set atop the grid and was filled with glass. A melt firing schedule was programmed into the kiln and away she went!


Step 3:

Wait a really long time for the firing schedule to finish and for the kiln to return to room temperature before opening. Here is the melt still inside the kiln after the top casting ring and grid was removed.


Step 4:

Clean and sand rough edges. Remaining fiber paper was scrubbed away and a diamond hand pad was used to sand down any rough edges.


Step 5:

Slump into shape. After finishing the edges I slumped the piece into a bowl mold. Unfortunately the edges of the piece didn't smooth and shine up like they usually do. This piece will require an additional firing (a fire polish) before it's finished.


I did a second pot melt, which I'll post about later. I used less glass in the second attempt, but this time I used too little glass and I wasn't able to get a full circle. Of course I neglected to record how much glass I used in both of these projects so it'll be tough to figure out a happy medium for my next attempt. Sigh.

Once I've finished the second grid melt I need to do some more shopping so I can try a melt using a terra cotta flower pot. The cover of Brenda Griffith's book shows a pot melt done with a orchid pot. So cool! I'd also like to get a few different shapes and sizes of stainless steel casting rings, which forms the flowing glass.